REWIND Roofing - Demolition and Salvage

OK - this is where I give up trying to track the conversion chronologically and give you snapshots of work that has been completed...
One of the characteristics of old stone/timber buildings (even brick if it is old enough) is that the materials creep - displace and deform - over time. I like to think of this as a gentle, century long "sigh". This can be disconcerting to the modern eye trained in straight lines and right angles. However it is also perfectly safe in older buildings, providing the materials themselves are not perished.
Our barn displayed this in three main ways:
- the ridge line
- the longitudinal purlins and
- the bulges in the external face of the walls where the truss was embedded
For us the challenge was to strip and preserve the roof's appearance and character.
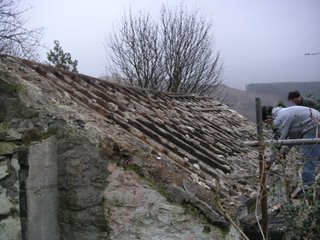
Stripping the roof took about a morning. The rafters proved to be rotten (yellow pine?) and were cut up for firewood in our woodburner. Battens were discarded. Some of the old hand made iron fixings were kept for posterity. A lot of lime pugging had been used - as well as a hotch potch of more recent patching techniques including lead straps, mastik and concrete rammed between slates to prevent water leaks and presumably rattling in the wind. The main horizontal purlins and central truss were checked and retained.
The intention was then to get new rafters in place and recover the roof with felt ASAP. This would prevent deterioration of the remaining timbers, the insides of the barn and also the walls/gables which were now exposed to the elements and with all the lime, ready to soak up the soft Welsh rain like sponges.
 First thing we did right was to install scaffold wide enough to move about on and temporarily store the slates removed from the roof. They are heavy and the closer they are to the roof made life much easier.
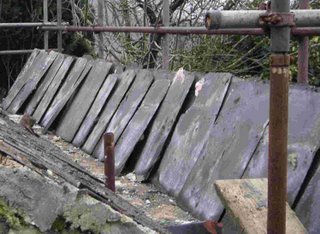
The second photo (below) shows the same slates after they had been stacked in one course per stack. The smallest ridge tiles are at the far end of the scaffold and appear to be on their side (never lay slates flat in piles as they are easier to damage and may crack under their own weight).
 Resorting the slates in this way cost the two of us half a (bitterly cold) day resorting them out but was vital as it helped identify the slates we need and where we may come up short.
The total width of the slates in any one course pile should be the width of the roof. The height of the slates in the pile will also match the batten spacing. You may be able to make out the calculations in yellow chalk on the slates - always at the top so it will be covered by other slate!


0 Comments:
Post a Comment
<< Home