Tuesday, March 14, 2006

Roofing - Slates


Welsh slate is arguably the best in the world.

At its peak, the quarries of North Wales supplied the world from the port in Bangor. There is something charming and authentic about an old slate roof that the modern equivalent just cannot achieve.

The keys to this are:

  • the size of the slates which give diminishing courses from eaves to ridge line
  • the rough hand cropped edges of old slate
  • the thickness of old slate, hand split
  • the weathered patina and appearance (yes, slate does weather)

I have mentioned before that we are relaying the same slate. Every builder we approached warned we would not be able to preserve more than 30 - 40% of the slate, and that replacements were as rare as hen's teeth. Were we sure we did not want a nice new roof instead?

Estimates for the value of the 300+ slates we had on our roof varied from £2.50 - £10 a piece. Tempting. It was hard not to think that combining these three facts however would see the builder strip the roof, sell the slate and charge for new materials.

So in the end we decided to do it ourselves - couldn't be that difficult could it? A nice manageable size (240" x 306" in plan) and no more than a few feet off the ground meant there would never be a better time to get our feet wet.

Roofing - Walls and Wallplates


It is a tricky bit of geometry, but preserving the purlins meant resting the rafters on them: which in turn dictated the angle of the roof and the position of the rafters in relation to the wall thickness. Modern purlins are oriented so that faces are vertical and horizontal - meaning that the rafters are often notched/bird-mouthed where they pass over them. Not so in this case - they were twisted to align with the gables so the rafters sat flat on their face.

It was at this point that we realised the condition of the walls and gables were a problem. Not only were they "rotten" (i.e. the old mortar had turned to a material resembling soil and the stones were loose) but there was no provision for edge rafters or wall plates. In short, it was under designed.

The next step then was to take down the loose top 6 - 12" of wall, removing all rotten lime mortar, insect and animal deposits, treasures and goodies (nuts, leaves, dirt, carcasses, shells etc.) and rebuild.

At this point the purist might hope for a tale of lime mortar mixes - not here. as this is not a listed building the instructions from architect and Building Control Officers were clear: concrete the loose material, filling the gaps and relaying the stone and broken brick as a very coarse aggregate.


The gables were a challenge all their own - the downhill end took 15 barrows of concrete before it was satisfied. This gable faces onto a neighbour's garden and catches the full force of the prevailing south westerly winds. Our neighbour tells us that it has been in need of work for many years but has been neglected. Previous occupants have attempted repairs with concrete, as seen in the photo to the right.

Looking at the missing mortar on the exposed face, you do not have to be an engineer to see this is the case. This is also the face that was most overgrown - tree branches, honeysuckle and ivy all grew up through this face and under the ridge tiles.

We also had to bring the walls to level and clear space in order to lay the 4" x 3" wall plates. Easier said than done, but fortunately those who had gone before had an eye for this and it was relatively straightforward working with the flat fieldstone to produce the level surface we needed.

The next challenge was to fix the wall plates: drilling into stone is easy enough, but bolting can lead to cracking. Fortunately, Thunderbolts came to the rescue - 8" long, self tapping and without the need for the expansive grippers which crack stone, we were able to get a good purchase even in relatively small stones without cracking them. As belt and braces (suspenders for US readers), we elected to resin some of the tricker holes first. We also engineered some straps which we embedded in the concreted wall sections and placed over the plates, screwing them into the plates.

There is no way those plates are going to lift or spread without taking the wall with them!

Monday, March 13, 2006

Roofing - Carpentry

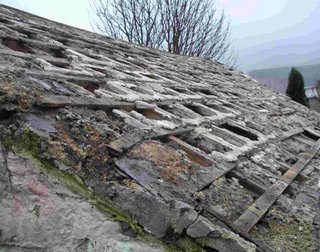
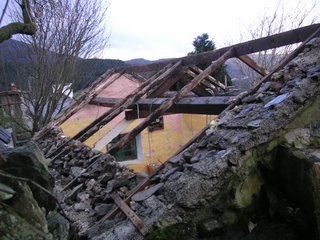
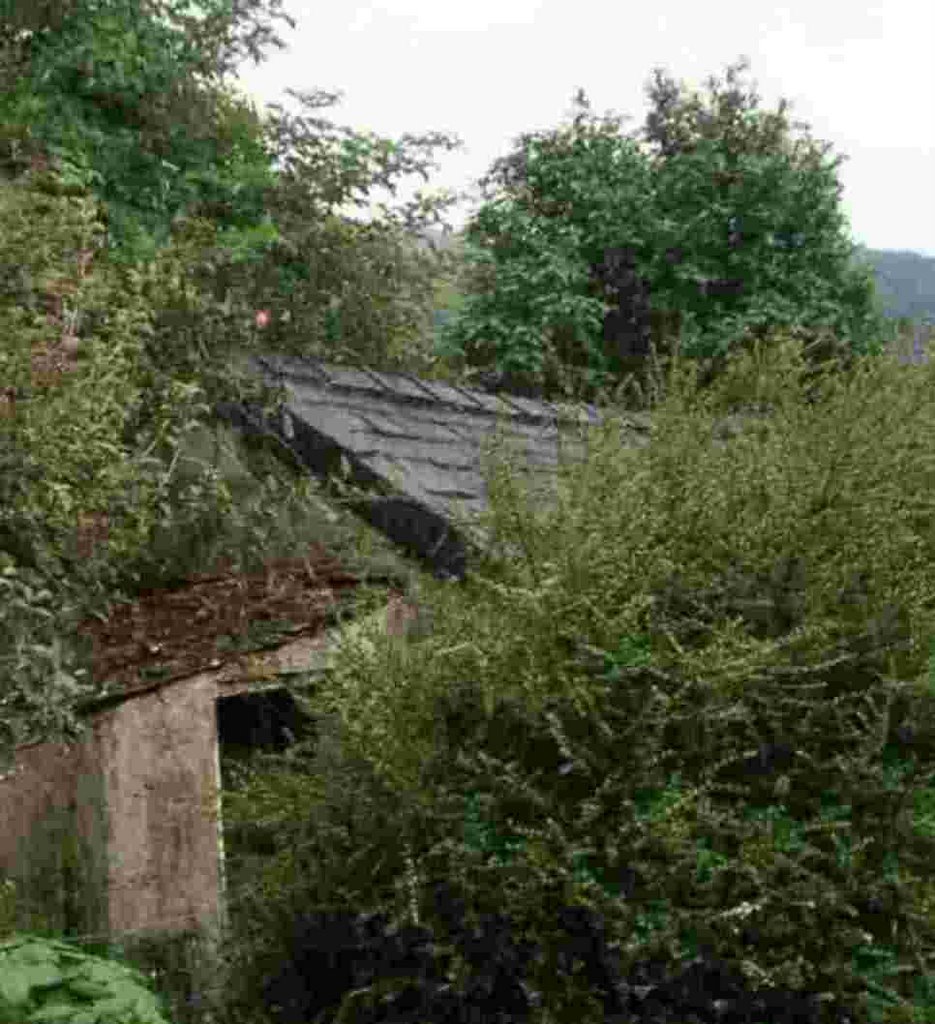
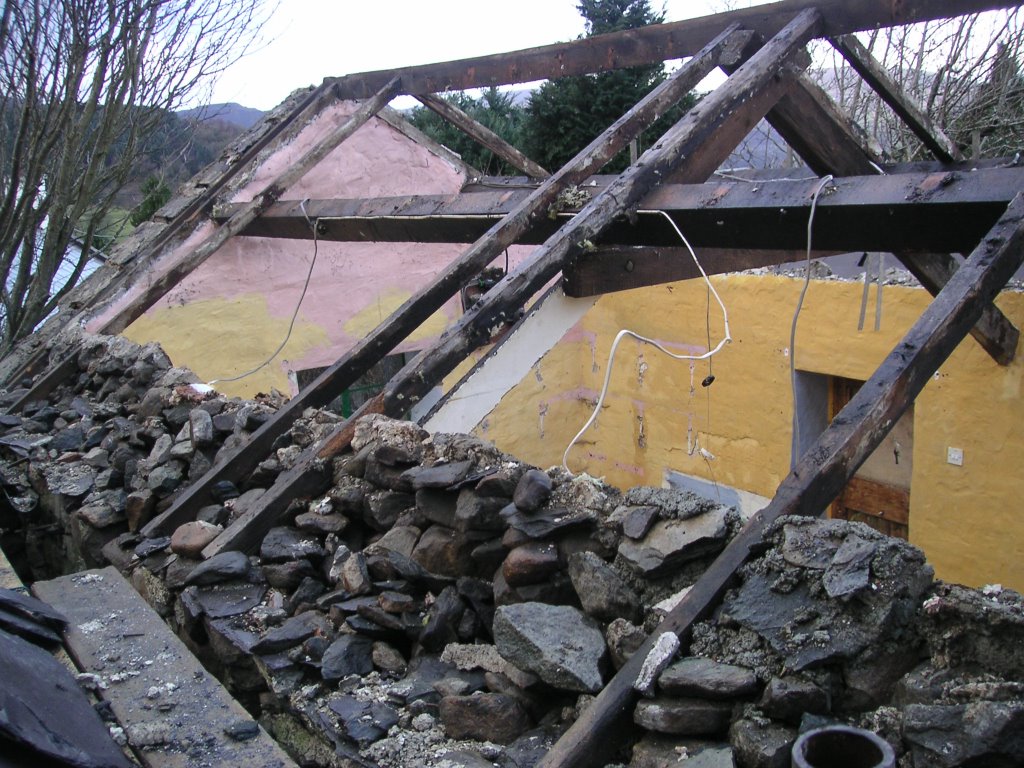
This photo shows the front face of the barn after the slates were removed, before the battens were stripped. You can see the mortar packing clearly.

Before we stripped the battens, we were advised by a neighbour to use a piece of wood (a new batten is ideal) to make a batten gauge.

This involved laying a new batten at right angles to the roof while the old battens were still in place and marking off the tops of the existing battens (and noting which it is!) on this gauge.

We also noted which was the top and bottom of the gauge. Our battens were parallel to the roof but I suppose if the battens vary across the roof, you would repeat with different gauges and note their position along the roof.

This was invaluable for us as we were able to know where to relocate the new battens in order to anchor the old slates.

Accuracy is all we have come to discover - a half inch is crucial when replacing slates.

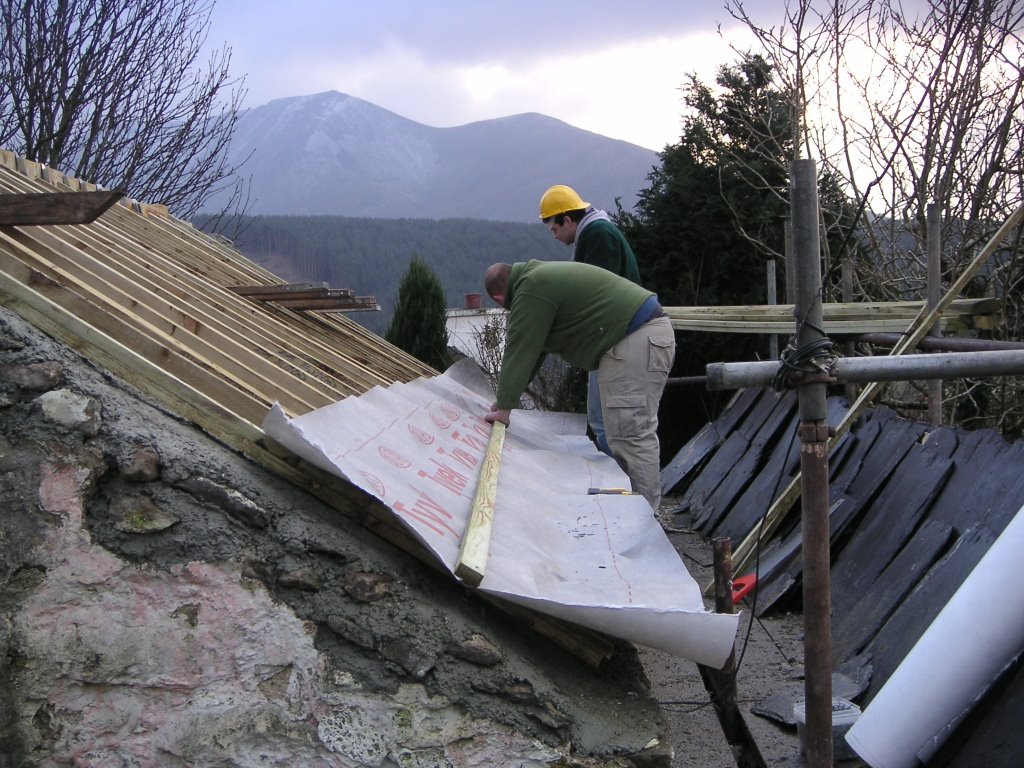
We replaced the old timber with new, tanalised (sp?) or treated, rough cut timber. No trusses here - we needed the roof space and were trying where possible to be sympathetic.

The old rafters were 2" x 3" (replaced with 2" x 4") at the same spacing as the old rafters. This was dictated by use of the grooves in the original stonework, even though it meant closer spacing (ca. 2' centres) than specified by the architect (ca. 3.5').

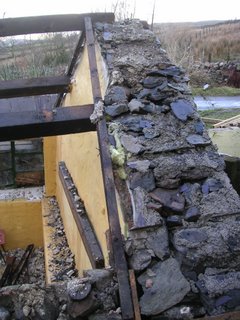
The battens (old and new) were 1" x 2". The wall plates were lengths of 3" x 4". The ridge plate was 6" x 1" and contrary to instincts, is non-load bearing. I will explain the structure in another post, but the ridge plate does not carry any load in this roof design.

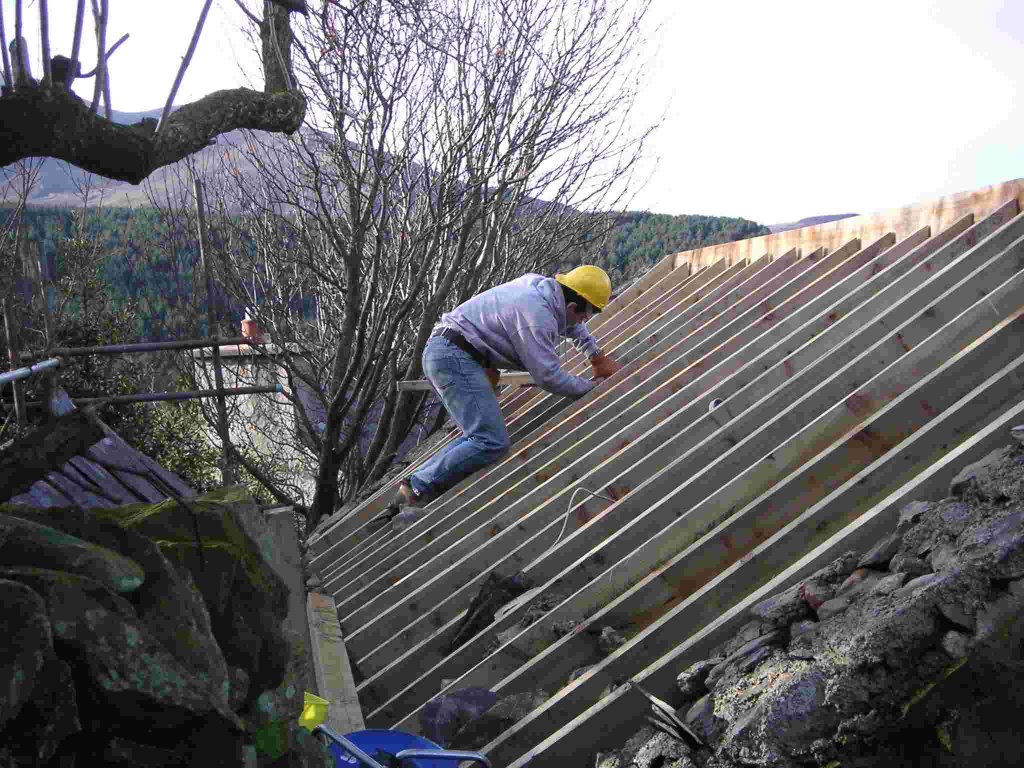
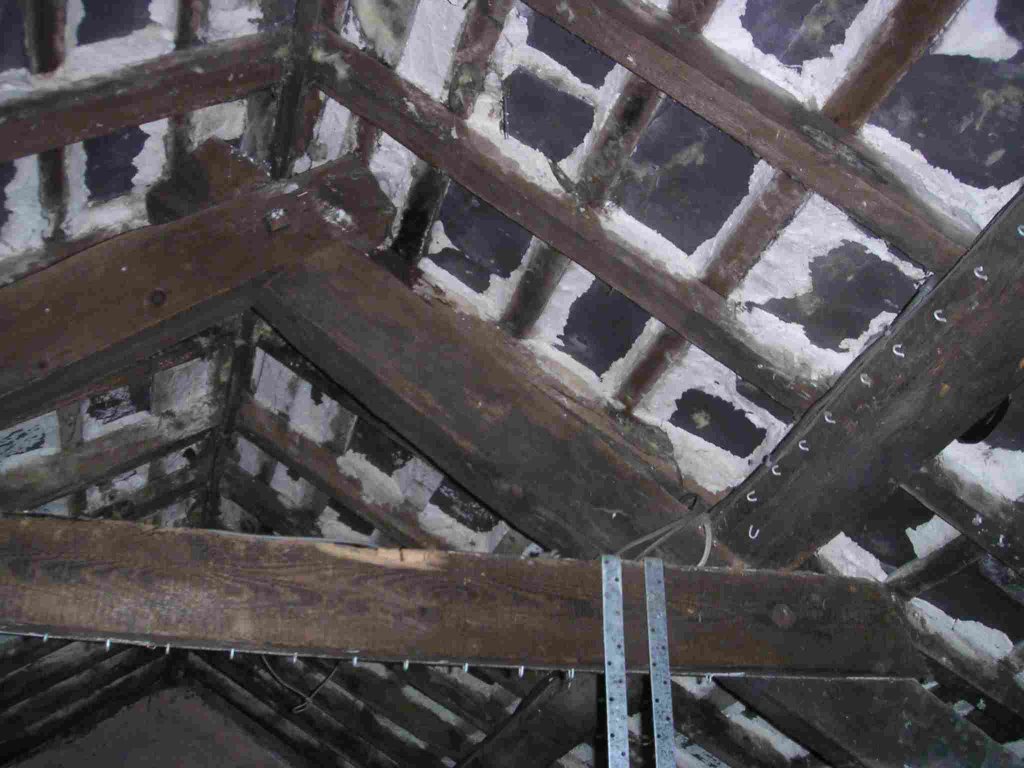
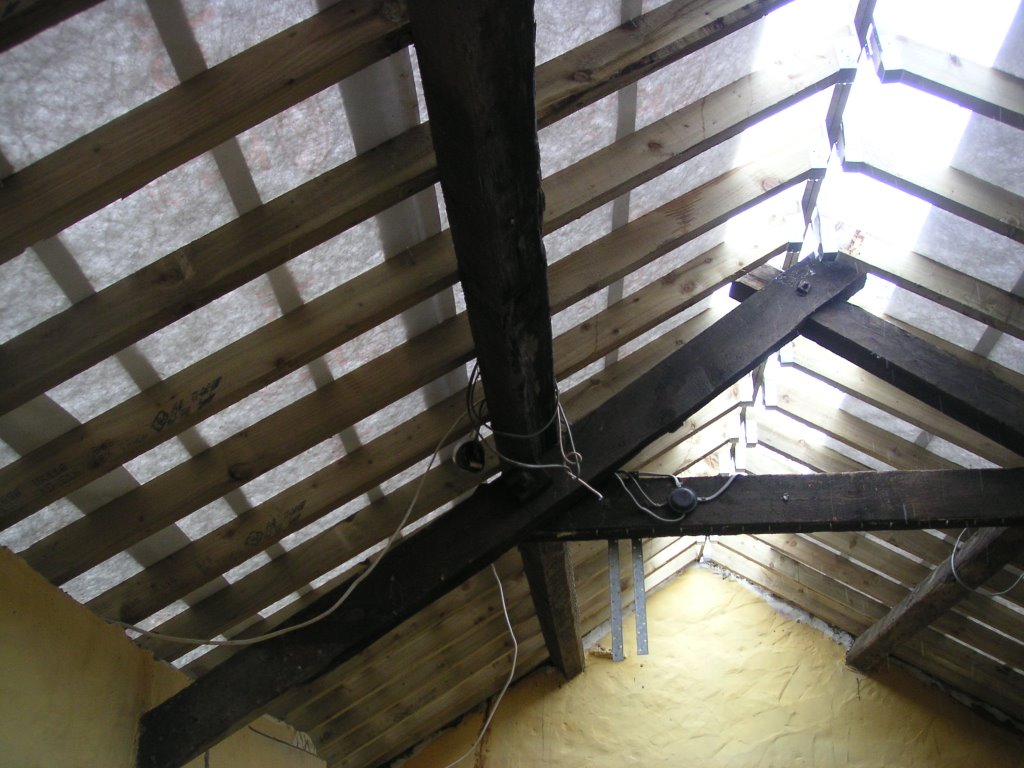
A mistake we made (a mixture of naivety and dumb luck) was cutting the rafters before the wall plates. This was an honest mistake as we were blindly replicating the old rafters. It meant the rafters were too short to overhang at the eaves line (the original roof had no overhang). As a result we had the additional hassle of cutting dummy rafters, secured to the wall plates and rafter ends which stuck out to kick up the eaves course of slates and carry fascia and guttering. This photo was taken before the wall plates were installed.

This ought to be balanced with a decision we made which was correct (albeit a mixture of luck and judgment)...

If you want to preserve the original roof profile, the chances are it is dictated NOT by the ridge plate but by the purlins which the rafters rest on. We elected to preserve the old purlins. As these supported the rafters and had sagged over time, so too the new rafters echoed this sag along the roof line. Although the new ridge plate was the first piece of new timber we put up, it only rested in place and gave a useful brace and reference point. After the rafters were in place (yes, and the wall plates!) we cut the new ridge plate to follow the profile of the rafter tops - relatively trivial step on our small roof.

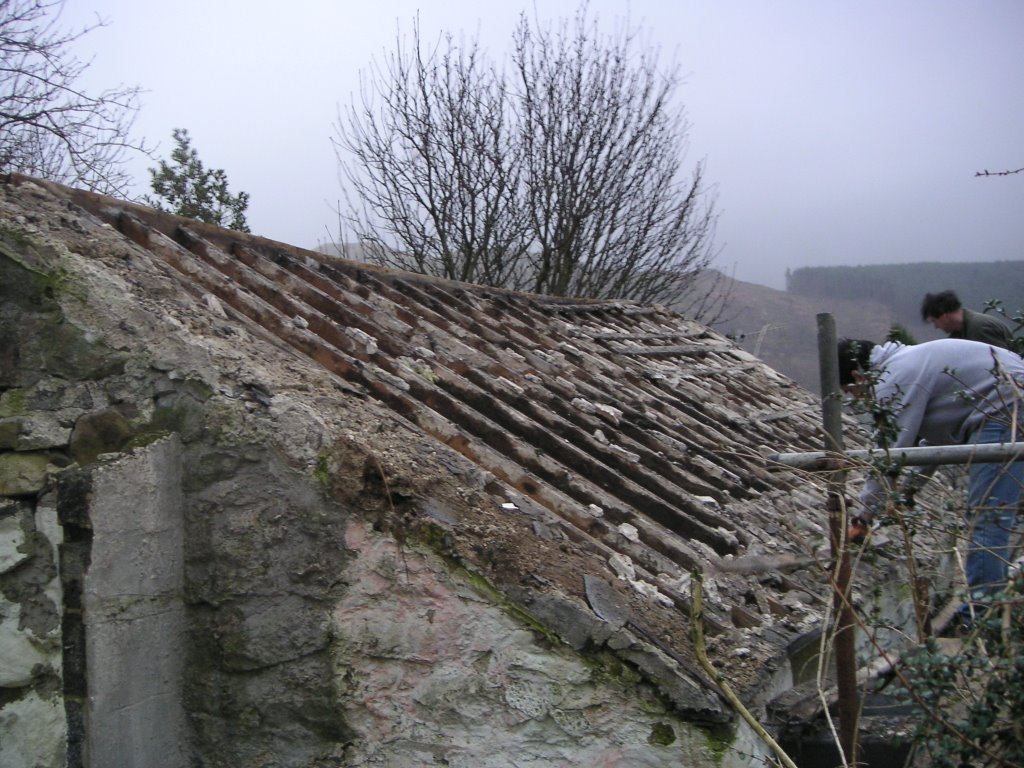
This photo was taken before the ridge plate was cut and shows how the rafter heads follow the line of the old sagging purlins (hidden) that they rest on.

REWIND Roofing - Demolition and Salvage


OK - this is where I give up trying to track the conversion chronologically and give you snapshots of work that has been completed...

One of the characteristics of old stone/timber buildings (even brick if it is old enough) is that the materials creep - displace and deform - over time. I like to think of this as a gentle, century long "sigh". This can be disconcerting to the modern eye trained in straight lines and right angles. However it is also perfectly safe in older buildings, providing the materials themselves are not perished.


Our barn displayed this in three main ways:


  • the ridge line
  • the longitudinal purlins and
  • the bulges in the external face of the walls where the truss was embedded

For us the challenge was to strip and preserve the roof's appearance and character.

Stripping the roof took about a morning. The rafters proved to be rotten (yellow pine?) and were cut up for firewood in our woodburner. Battens were discarded. Some of the old hand made iron fixings were kept for posterity. A lot of lime pugging had been used - as well as a hotch potch of more recent patching techniques including lead straps, mastik and concrete rammed between slates to prevent water leaks and presumably rattling in the wind. The main horizontal purlins and central truss were checked and retained.

The intention was then to get new rafters in place and recover the roof with felt ASAP. This would prevent deterioration of the remaining timbers, the insides of the barn and also the walls/gables which were now exposed to the elements and with all the lime, ready to soak up the soft Welsh rain like sponges.

First thing we did right was to install scaffold wide enough to move about on and temporarily store the slates removed from the roof. They are heavy and the closer they are to the roof made life much easier.

When we removed the slates we stacked them along the scaffold, as they came off the roof: first course off was the ridge course and therefore at the back of the pile - which meant it would be the last course back on. The photo above shows this. Logical but wrong.

The second photo (below) shows the same slates after they had been stacked in one course per stack. The smallest ridge tiles are at the far end of the scaffold and appear to be on their side (never lay slates flat in piles as they are easier to damage and may crack under their own weight).

Resorting the slates in this way cost the two of us half a (bitterly cold) day resorting them out but was vital as it helped identify the slates we need and where we may come up short.

The total width of the slates in any one course pile should be the width of the roof. The height of the slates in the pile will also match the batten spacing. You may be able to make out the calculations in yellow chalk on the slates - always at the top so it will be covered by other slate!

**START HERE**

OK - getting the hang of this blog thing now, by no means a master, nor are we newbies. One of the things I love about building and this blog is learning cool new stuff!

Now you have told us about the zillion other building blogs out there, we have put the best in the links on the right hand column (where are the British ones?).

Reading these also helped us make two more decisions:
  • because this is supposed to be helpful to others doing the same thing, and not just getting a vicarious kick out of it (but it is OK to enjoy the kick too), we will title the blog entries in meaningful ways - dull but useful
  • because this blog started some months after the conversion, we will prefix the old pictures and stories from now on with the word "REWIND" in the title

Wednesday, March 08, 2006

Bacon and eggs

Following on from the earlier post listing other blogs - posted by committed people - and the comments they attract from interested people...

Had to smile when I read that the difference between 'interest' and 'commitment' is illustrated by the traditional fry-up of bacon and eggs: the chicken is interested - the pig is committed.

Keep the comments coming!

Monday, March 06, 2006

Other conversion blogs

On a whim I searched for other blogs that record people's renovation and conversion projects. There is a lot of talk about them, and a lot of talk about property, but very few good examples that I could find in a 60 minute search with Google.

We are not responsible for the content of these sites, but here are one or two more relevant multi-cultural links to:


  • The record of a 'brownstone' renovation in New York city that also includes local neighbourhood and development/real-estate issues
  • A gite in Brittany, France that has been completed (and is now taking bookings!)
  • A house renovation in an historic area of New Orleans, USA - post Hurricane Katrina

Reading these also made us think about why we are doing this:

  • The first reason was we wanted to keep our family around the world up to date with progress on the accommodation they will be using when they visit
  • When we looked around we found very few 'real life stories' about old restorations. They were usually partly told, or were incomplete, or were a partial restoration (a new extension, or new bathroom), or dealt with a modern property
  • We also thought it might inspire people to visit or even try a project like this themselves

Building the web site

We are starting to generate all sorts of interesting traffic now - so last night after the show I secured the domain and sorted out our world wide web site. We used the services of the good people at www.bravenet.com

Not much more than a place holder at the moment - the action is all here on the blog, but you can see what we have done at www.welcomeinthehillside.com

Need to learn the .ftp protocols so this blog can be hosted on our own site. Does anyone out there know how to access the html trcking code used by Tracksy.com for their traffic counter?

Thanks for visiting!

Look & learn

Yesterday went to the H & R Show in Birmingham's NEC. Three halls filled with everything for the home builder and renovator: innovative products, traditional methods, the useful (windows, doors, heating), the mundane (concrete, slate and brick) and the flash (central sound, light and environmental control).

Hard on the feet and the pocket but cannot be beaten for a one-stop-shop to look and learn about the products you need, ask advice and remind us that we were not nuts for taking on the project in the first place.

We made buying decisions about windows, doors, underfloor heating, radiators, septic tanks, roofing materials (insulation and felting), a roof light and internal lights.

The best part was meeting people who know their stuff and are passionate about their products. It is more than just a job and a £/$ for them. These are people we can work with!

Look for more information in the Technical Links on the right in due course...

Saturday, March 04, 2006

Walls, drains and an automobile

Work stopped until December 2004 when the council contacted us to say they intended to start work in the spring on the drain on the track immediately above the barn. You can just see the start in the bottom left hand corner of this picture of the track.

There has been a long standing problem for people lower down the mountain: heavy rain or melt water running off the mountain is not all caught by the kerb in the picture and it spills onto the road, across it and hundreds of yards downhill, in through their front doors.

Unfortunately this meant the loss of our natural grass verge, replaced with standard issue, concrete sections. The picture below (24th April 2005) shows the kerb and new berms designed to divert water from R to L across the road, into the new drains.

The picture also shows a car that appeared one day in January 2005.

Such is country life: everyone knows who owned it, but not how or when it got there. Not sure it even had an engine. It was full of holes and rubbish and several windows were broken. Anyway, after a few weeks, and spreading the word around through the farmer that we were not happy, it disappeared again. The history of the barn that we know has been colourful to say the least - a book could probably be written about previous residents (or another post at least).

In the meantime just have a look at the dry stone wall on the RHS of the picture - a little close to the kerb perhaps?

First clearance complete

So enough of the scenery (more to come) and back to the story...

By 30th August 2004, the first clearance was complete (second actually if you include the junk we took out of the garden when we first bought it).

We had also pruned the trees and shrubs which overhung the barn, in anticipation of erecting scaffold for the roof. This included removing the honeysuckle which over the years had become fused with the roof, sending roots and shoots under the slates, into the wall and under the ridge tiles.

It was evident that the roof of the old block lean-to was poorly built and on the point of collapse. After cleaning off the sheets of moss and accumulated debris, the old slates were recovered carefully.

These hand cut "randoms" as they are called were various sizes - some nearly 30" x 18" - but were stacked carefully to be reused on the new roof - pitched to match the line of the roof (about 115 deg).

What also became apparent was that when the overgrowth was removed, the exposed dry stone wall adjacent to the barn (the sheep fold), was dangerously unstable and crumbling. So the summer of 2005 was a time of rebuilding the wall. This was the first major construction job as the farmers needed the walls stable and tall, so they could control the sheep while being herded up the mountain.

Before:

After:

Friday, March 03, 2006

Let it snow!


I am still catching up with the photos of progress to date, however, the roof of the barn is off and the new rafters and felt are in place. Neatly battened down to prevent being blown away in the 40mph winds we have been experiencing. And completely waterproof so the rain is not a problem either.

But now it is snowing - 5 inches so far today. I called the farmer and he says it is impassable at the moment so I won't even bother trying to go up.

Nothing to do except sit and watch through the webcam. The felt seemed strong enough when we moved around on the roof - this should be as good a test as any.

Thursday, March 02, 2006

Across the valley

One of the joys of getting to know a particular setting is seeing it in different light, under different conditions and at different times of year. Both these photos are looking across the valley below the barn - the one below is taken from slightly higher up.


Perhaps we should set up our own live webcam of this view when building works are completed.

What's in a name?

Our cottage and barn are at the top end of an old farmyard, broken up in the 1950's.

As the highest cottage on the farmyard, our cottage has been known locally for years as "Ty Uchaf" (literally "top house").

The barn sits immediately below and therefore we decided to call it "Ty Isaf" (literally "lower house"). For those unfamiliar with Welsh, this also rhymes with the cottage's name. A closely related Welsh word ("isel") also conveys a sense of rude, basic or humble - which is apt given its small size and careful but unrefined construction.

Interestingly the cottage has carried many different names in recent years as owners have come and gone, however, the local name has stuck and we will restore it, when work is finished.

Pictures say more than words

One of the best pieces of advice we received was to "live" with the barn and cottage before we did anything. This has given us a feel for the setting and the best way to make sensitive changes.

This photo of winter sun across the valley, Boxing Day 2004 was taken from a favourite outlook, some 15 minutes walk from the barn.


This snap of the Carneddau behind the barn was taken on the 16th March 2003 - a cloudless spring evening when the colours of the mountains were changing from minute to minute with the setting sun.

A load of rubbish


This 8 cu yard skip gives an indication of the amount of rubbish removed at the end of August '04 .

When we first bought the property we had already filled one skip with the junk from the garden - including remains of a small green house, old broken children's toys, broken tools, glass, plastic etc.

We also started work on clearing the shrubbery from around the barn. Over 10 ft high in places, the diverse annuals and shrubs had been carefully selected at some point. They were now hopelessly overgrown and being choked by brambles and nettles.

There would be much more of this to come...

Bringing the ceiling down


In late August 2004 we started the work of stripping the inside of the barn.

The barn had been occupied by a family of four (!) who had moved on in the mid '90s, leaving nothing more than unpaid debts and evidence of some works.

The ceiling comprised polythene sheets and plaster board, with insulation stuffed between it and the underside of the slates (more on these later). They had also plastered and concreted parts of the walls.

Removing this ceiling was a long dirty and dusty day's work with brother and nephews, but revealed an original roof, probably untouched since the mid 1800s when we believe the barn was built. The white material is a lime mortar stuffed between batons, rafters and slates. The metal straps supported one corner of a sleeping platform, while the U staples presumably carried a curtain to the same.

The interlocking A truss with central bolt is characteristic of this kind and period of construction. Planned use of a thin, lightweight, composite insulation (cold roof) should mean the truss and purlins will be visible when the renovation is finished.

A look inside

The inside of the barn is surprisingly intact. Ground level behind the wall on the left is about 6 ft above (inside) floor level. The eaves are about 10 ft above (external) ground level.

The plaster that has fallen off revealed a bituminous undercoat which has prevented much penetrating damp.

This damp patch in the corner comes from a hole in the roof where a stove pipe used to exit.

Building Control have requested details of a damp course (!) system. Presumably this would be chemical and injected. In a massive rubble wall construction some 2 ft thick, we suspect this is unnecessary, ineffective and expensive - or do you know differently?

The floor is concrete and has a step about 18 in. high in the middle. This is what we would expect for a cow barn and as there is no evidence of damp ingress we are inclined not to disturb it. We would simply install a DPC and insulated, heated floor on top of it.

What we are planning


We have received planning approval for change of use to temporary accommodation with a living area, kitchen, shower room/toilet and 'crog loft' or sleeping platform over. These are two early drawings which we used to secure the necessary planning permissions.

Our own cottage (Ty Uchaf) is above the derelict barn but only has two bedrooms. Ty Isaf will provide much needed space when family and friends visit. Two adults (double) and two children (twin) could comfortably stay for a week or more using the crog loft and the sofa bed in the living room.

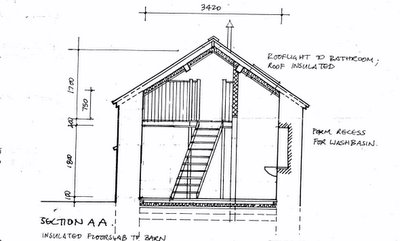
The interior, like the exterior will respect the traditional construction, with slate and wood flooring. Section AA shows the crog loft above the living area, with the shower room and recessed hand basin on the RHS.

The roof will be part exposed to show off the delightful central truss and long purlins which run the length of the barn (not shown in section AA).

We are in discussion with building control but we hope to use lime based paint and mortar to avoid dry lining the walls and so preserve their character (bumps and bulges!).

I expect the plans will evolve during construction - but we are determined to avoid some of the common mistakes.

Wednesday, March 01, 2006

Where on earth...

Image produced from the Ordnance Survey Get-a-map service.
Image reproduced with kind permission of Ordnance Survey and Ordnance Survey of Northern Ireland.

We are in the Snowdonia National Park, North Wales.

The barn is orientated NE/SW on the shoulder of a spur, about 1000ft above sea level. The barn is sheltered from the worst of the elements by the hillside above it and a copse of trees behind it.
Even at that modest altitude we enjoy own micro-climate. In the winter, snow often lies on the ground when there is little more than a rain shower lower down the valley. On summer and spring days we can bask in the most glorious sunshine while lower down, the sun is hazier. The combination of extra altitude and breezes also mean it is easy to burn unless you cover up or use cream.
Check out the weather now from this nearby web-cam.

The land behind the barn is leased to our local farmer and drops into a steep sided valley. The river running through it is rich with trout and further downstream, salmon are regular visitors. Even the occasional otter has been spotted.

Above us there is nothing but the Carneddau and the mountains of Snowdonia.

Lurking in the undergrowth

This is the compulsory BEFORE shot; overgrown, unloved and hidden away waiting to be discovered.

The barn has a small block outhouse at the uphill end. This was used as an "unplumbed privvy" (bucket and neighbour's septic tank were the order of the day) but will be rebuilt as a log shed and drying room.

These first few posts are posted in early March 2006 but cover the period from late 2003 to present days. Once we are up to date we will start posting in real time.

A Welcome in the Hillside


"We'll keep a welcome in the hillside
We'll keep a welcome in the vales
This land you knew will still be singing
When you come home again to Wales."

These few words sum up what we are trying to do; build a welcome for those friends and family who love Wales and call it home.

We are renovating a small barn on the shoulder of a small valley in Snowdonia National Park. Overgrown by hydrangeas, nettles and brambles, we bought it in 2001 and have been thinking about this for a while. Now we have started clearing and renovation work in earnest, we wanted to post our pictures and updates through this blog as a record of progress.

We welcome your suggestions and comments - especially if you have done something similar, are attempting it, or if one day you too would like to "come home again to Wales".

Enjoy the pictures, share the adventure, tell us what you think!